In order to use this extension you must register your credentials through UPS®. These credentials are used to authenticate communication to the UPS systems for getting information like rates, UPS Access Point™ locations, and generating labels.
1. Log In To Admin Panel
First log into your Magento admin panel, click “System”>”Configuration” in the navigation menu. Then, click on “UPS Registration” under the WebShopApps tab. This is located in the configuration page on the left side of your screen.
2. Choose Register for UPS Access
Under the UPS Registration panel click the “Register for UPS Access” link. You will be redirected to the registration form that will collect information from you to generate your UPS credentials.
3. Fill Out Registration Form
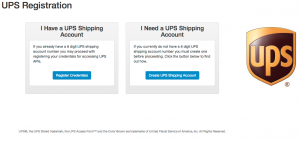
The registration form consists of 3 steps: The license agreement, customer information, and account information. When you first arrive at the registration page you are presented with two options. The first option indicates that you already have a 6 digit UPS Shipping Account and that you can proceed with the registration. If the second option applies to you, you must register a UPS Shipping Account before proceeding.
a.) License Agreement
In this step the UPS license agreement is shown. You must scroll completely through the agreement before you can proceed.
b.) Customer Info
Next, you must fill out your contact information. This information must match your UPS account’s contact information. It may be useful to verify it against a recent invoice to ensure that the information you’re entering will match your UPS account information.
c.) Account Information
In the last step you must provide you account information. If your UPS account has not been invoiced in 90 days (US and Canada) or 45 days (all other countries) you can submit the form without providing invoice information. However, if you have been invoiced in that period you must enter the invoice information.
4. Registration Complete, Copy Your Transaction ID
After you successfully complete the registration you are given a transaction ID. Immediately copy this ID. You must use this ID within 24 hours in your admin panel to add your credentials. After 24 hours this transaction expires.
5. Add Newly Created UPS Credentials to Admin Panel
Go back to your admin panel under the UPS Registration and paste your transaction ID into the field provided. Then click “Retrieve UPS Credentials”. You will be notified that the credentials were successfully imported.
Click “Save Config” and your credentials are added to the system.
After completing this step, you’ll need to configure the Delivery Options for UPS extension.
UPS®, the UPS Shield trademark, the UPS Access Point™ and the Color Brown are trademarks of United Parcel Service of America, Inc. All Rights Reserved.


